Posts

Showing posts from October, 2022

Creating VPC Network
Image
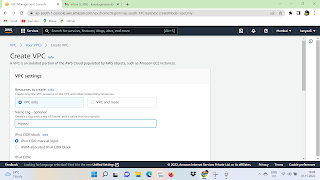
To create a VPC, subnets, and other VPC resources: 1 . Open the Amazon VPC console at             https://console.aws.amazon.com/vpc/ 2 . In the navigation pane, choose  Your VPCs ,  Create VPC .     Under  Resources to create , choose  VPC. 3.  Modify the options as needed:      ->  Name tag auto-generation,     ->  IPv4 CIDR block : Choose an IPv4 CIDR for the VPC. This option is required.   4.  Choose create VPC: To view VPC details using the console: 1. In the navigation pane, choose VPCs. Select the VPC, and then choose View Details. 2 . After creating VPC , then click security groups option in the navigation bar, then choose create security group option. 3 . A form will open, enter details. Select Id of your VPC , then select the Yes, create button. 4 . The list of groups opens. Select the group name from the list and set rules. Then click the save button. Launch Instance into VPC: 1. Select EC2 and click launch instance option in the navigation bar. A page opens. Choose

EBS volume Creation

Image
Steps to attach and Mount an EBS volume to EC2.     Step 1: Head over to EC2-> Volumes and create a new volume of your preferred size and type. Step 2:  Select the created volume, right click and select "Attach volume" option.   Step 3: Now login to EC2 instance and list the available disks using the following command.

Network Virtualization

Image
 Network virtualization             N etwork Virtualization  is a process of logically grouping physical networks and  making them operate as single or multiple independent networks called Virtual  Networks. Step 1: Create the virtual machine in virtual box Manager. Step 2: In settings, select network and window appears in adapter, enable network adapter  and click Internal network and give the name you want. Step 3: In adapter 2,  it is not attached and click ok button. Step 4: Here you can see window, that in network you can see the changes that you have done. Step 5: Run the virtual machine that you have created , in VMbox.                           Step 6: And in network, select the open network and sharing center which is shown. Step 7: Select the network.  

EC2 creation

Image
 Steps to create EC2 instance: Step 1: Sign in to AWS. The AWS Management Console   will open. Note: You need to provide credit/debit card information for your new account. Step 2: In service, click on EC2, or type "EC2" in the search box and then click Enter. Step 3: In the EC2 Dashboard, click on the Launch Instance button. Step 4: Provide a name for the instance. Step 5:  Choose an Amazon Machine Image(AMI)   Scroll and select. Step 6: Choose an Instance type. Step 7: Create a key pair "public" and "private" keys that will be used for securely connecting to your instance from your computer. The public key will be  a part of your EC2 instance configuration  and the private key will be kept on your local PC or Mac. Step 8: In the Network settings, choose Select existing security group. Step 9: Click on the Launch Instance in the lower right.

EC2 Connection

Image
                 Step 1:From the Dashboard, choose Launch Instance.                 Step 2:When prompted for a key pair, select Choose an existing key pair, then select the key pair that you created when getting set up.                     Step 3:When you are ready , select the acknowledgement check box, and then choose Launch Instances.                    Step 4:On the Instances screen, you can view the status of the launch. Step 5: Click the Finish button to exit the setup wizard. Step 6: Click load to generate Putty Key. Step 7:Save the key. Step 8: Choose Ip address and port . And click Open.                          Step 9: Choose the file that you have saved and browse it. And click open. Step 10: Connect to Instance.