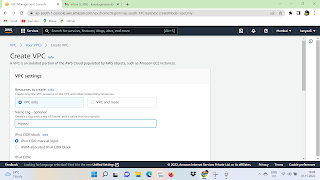
To create a VPC, subnets, and other VPC resources: 1 . Open the Amazon VPC console at https://console.aws.amazon.com/vpc/ 2 . In the navigation pane, choose Your VPCs , Create VPC . Under Resources to create , choose VPC. 3. Modify the options as needed: -> Name tag auto-generation, -> IPv4 CIDR block : Choose an IPv4 CIDR for the VPC. This option is required. 4. Choose create VPC: To view VPC details using the console: 1. In the navigation pane, choose VPCs. Select the VPC, and then choose View Details. 2 . After creating VPC , then click security groups option in the navigation bar, then choose create security group option. 3 . A form will open, enter details. Select Id of your VPC , then select the Yes, create button. 4 . The list of groups opens. Select the group name from the list and set rules. Then click the save button. Launch I...




.png)
Comments
Post a Comment